
Drywall Repair Las Vegas is necessary for home renovation and remodeling projects. It can be messy and time-consuming, but it doesn’t have to be complicated.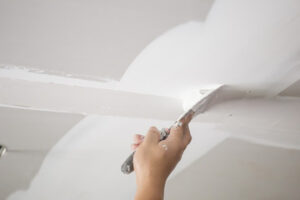
Small holes (up to six inches) are a simple fix for even the most inexperienced DIYer. Fill the hole with drywall compound, sand until smooth, and paint.
Cracks in drywall occur at the seams where two segments of the wall meet. Drywall is prone to cracking at these seams because they are the weakest points in the wall. Fortunately, most cracks can be easily repaired by re-taping the seams. Some cracks are red flags and should be fixed immediately by a reputable drywall service, depending on the severity and location of the crack.
Small, hairline cracks are common in new homes and usually result from settling of the home. It is important to wait a year or more before patching any cracks in a new home, so that the wood has time to settle and the drywall has time to dry. If the drywall is patched too soon, the cracks will reappear as the house continues to settle.
Wide cracks in drywall are a red flag and should be fixed by a professional right away. These cracks may be caused by a number of issues, including a serious problem with the structure of the building. Jagged cracks are especially concerning, as they can indicate that the foundation has shifted or cracked, and they can also be caused by deterioration of supporting wood members due to termite damage.
If you find a large crack in your drywall, use an electronic stud detector to locate the underlying studs. Then, cut along the stud with a drywall saw or reciprocating tool to remove the damaged drywall. It is important to remove as much drywall as possible without cutting into or through the underlying studs.
Once the old drywall is removed, take the opportunity to repair any other problems with the studs and the framing, such as loose or missing nails or screws. Next, clean the area and prime it with a high-quality primer. Once the primer is dry, re-tape the seams. To help the re-taping adhere well, apply a thin coat of joint compound to both sides of the crack before applying it. Once the compound is dry, add a strip of fiberglass tape over the crack, and smooth it into the joint with a putty knife.
Bumps and bulges
Drywall is a popular material for walls and ceilings in modern homes. It is made from gypsum plaster and thick paper, making it relatively easy to install and durable. But as with any construction material, drywall can develop problems that need to be addressed. One such problem is a bump or bulge in the drywall seam. This issue usually indicates a problem with the underlying structure. Typically, if you see a lump in your drywall, it is caused by a lack of proper pressure on the seam or some other defect within the wall or ceiling. In some cases, this is a temporary issue that will resolve itself with time. In other cases, it is a sign that the drywall needs to be replaced.
Another common cause of a small drywall bulge is improper installation. Sometimes, installers drive screws too deeply into the drywall, breaking the paper and causing it to swell. This type of damage may be hard to spot until you sand the wall, as the screw head will sink slightly below the surface of the drywall. To repair this issue, use a stud finder to locate the offending screw and remove it. Then, drive new screws into the studs about 12 inch away from the old ones. Cover the new screws with thin coats of joint compound, allowing each to fully dry before adding the next. Once you have smoothed the area, sand again and paint.
Water damage is also a common culprit of a drywall lump or bulge. Moisture decreases the strength and durability of drywall, so it is important to attend to any problems immediately to prevent them from worsening. If the drywall is damaged by water, it will need to be replaced.
If the drywall is only mildly affected by water damage, you may be able to replace only the damaged panel instead of an entire sheet of drywall. To do this, cut a piece of drywall that is a bit larger than the damaged panel. Sand it down and apply a coat of joint compound to the edges. Use a putty knife to cover the screw holes with the adhesive compounds and sand it again once it has dried.
Loose tape
When drywall tape pulls away, it creates a noticeable blemish that can be unsightly. Fortunately, this type of drywall problem is usually a sign of water damage that requires professional attention, not just a cosmetic fix. Drywall tape separation often occurs because the house has settled and shifts the drywall that covers the ceiling seams. Changes in humidity and a host of other issues can also cause loose tape.
If only a small area of the tape is pulling away, it may be possible to glue it back in place with a regular household glue such as Elmer’s or wood glue. It’s important to clean the affected area with a damp cloth or brush so that the new glue will adhere well. After gluing the tape, allow it to set for the time indicated on the packaging. Then apply a thin coat of joint compound over the area to cover and blend the repair with the rest of the seam.
More severe cases of loose drywall tape can be repaired by sanding down the surrounding seam and then applying a new bed of joint compound, recommends Taping Walls. This process is best done in stages, allowing each layer to dry before working on the next. Ensure the area is well-sealed, and then sand again with 120-grit sandpaper or higher for a smooth finish that will blend in seamlessly with the rest of the seam.
While sanding, make sure to wear gloves, eye protection, and a dust mask to avoid breathing in any particulates. It’s also a good idea to remove any furniture or other objects from the room, and use a drop cloth on the floor below the work area.
When you’re ready to re-tape, use self-adhesive mesh drywall tape for the best results. Be careful not to overlap the new tape with existing tape at either end of the repair area. A 1-inch gap between the beginning and end of the new tape is fine. As you tape, be careful to press firmly and keep the surface as flat as possible to avoid creating an uneven seam.
Water damage
When drywall becomes water damaged, there are several clues to look out for. The first is discoloration. Wet drywall looks darker than it does when dry because the paper is coated in a thin layer of fungicidal compound that turns brown as it absorbs moisture. If a wall has a distinct discoloration, it needs to be repaired right away to prevent further damage and mold growth.
Another sign is bubbling. When drywall is wet, it will bubble and wrinkle just like a sheet of paper. This is often a sign that the drywall has been affected by a serious leak or flood, and it will need to be replaced. It’s best to hire a professional for this type of work, as the water may contain harmful bacteria or contaminants that can’t be cleaned properly with do-it-yourself techniques.
Once the drywall has been repaired and is completely dry, it’s time to paint again. Be sure to use a waterproof paint that is specifically designed for walls. It’s also a good idea to apply two coats, rather than just one, to make sure that there are no residual stains.
While it’s possible to touch up some blemishes in the drywall, if there is any major damage to the surface, you will need to repaint the entire area. This is especially important for areas that were heavily affected by water, as mildew can quickly develop in wet material.
The most common cause of drywall water damage is a leak, which can come from many sources, including floods, hurricanes, a burst pipe, or condensation from air conditioning units. Once the source of the leak has been addressed, it’s important to fully dry the area to limit further damage and prevent the formation of mold. This is usually done by pointing an area fan at the drywall and plugging in a dehumidifier. It takes about three days for wet drywall to thoroughly dry.
To repair water damage in drywall, start by removing the damaged section of wallboard. Then, use a level to check the sagging of the remaining drywall. If the drywall has sagged more than an inch, it will need to be replaced. Once the new drywall is installed, use drywall clips and drywall screws to hold it in place.